
An interior space often doesn’t feel fully realized without a few careful accents. It can be tricky to source meaningful tchotchkes, so why not create a few decorative items yourself instead? Papier-mache gets an adult update with a chic set of nesting bowls.
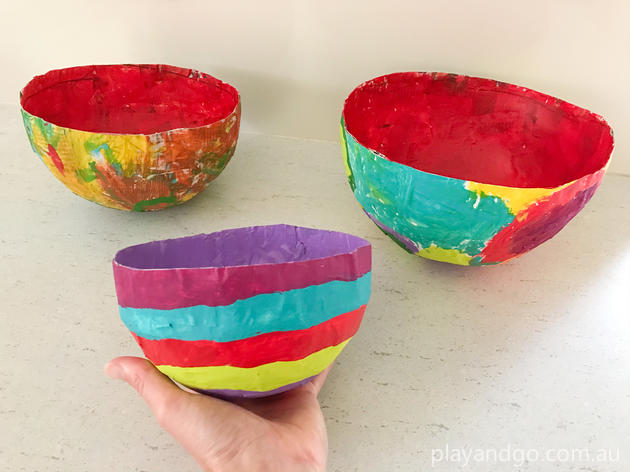
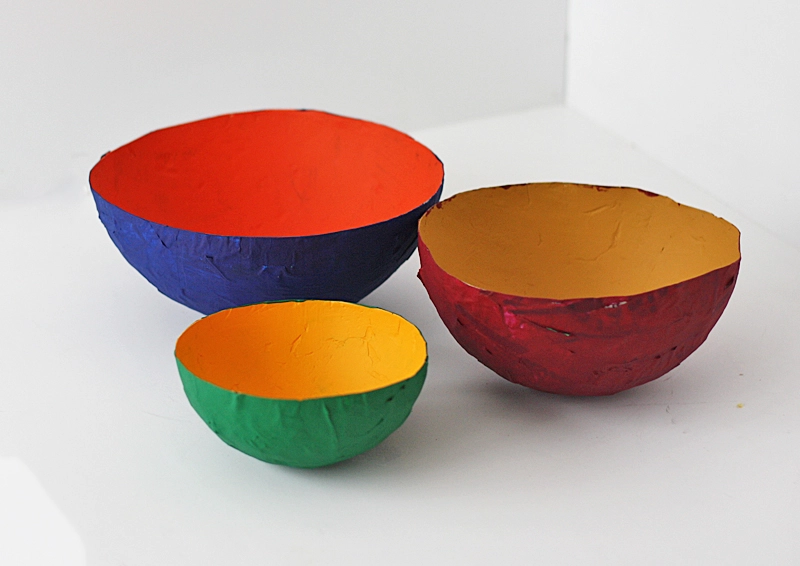
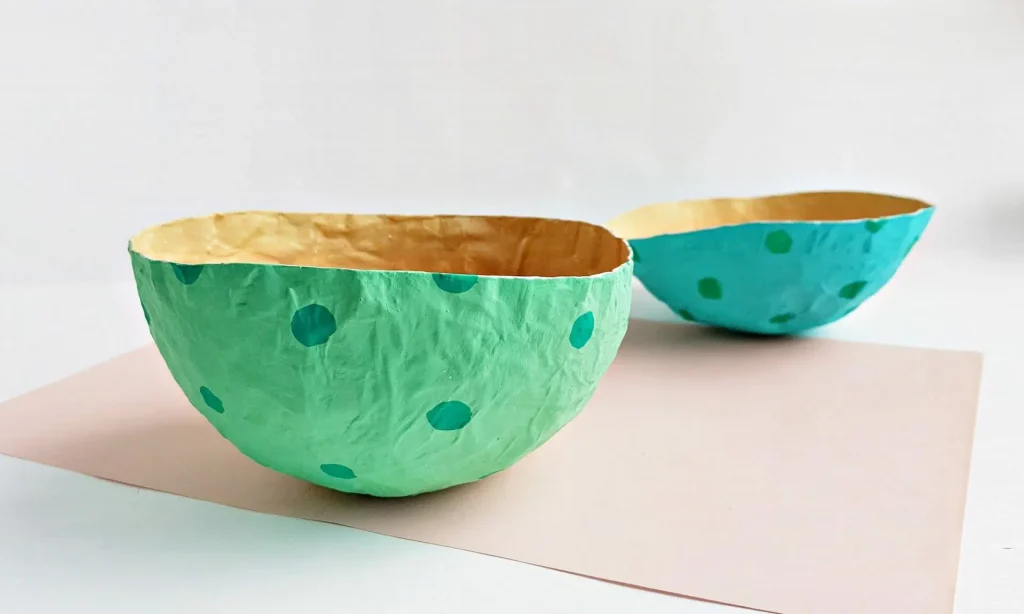
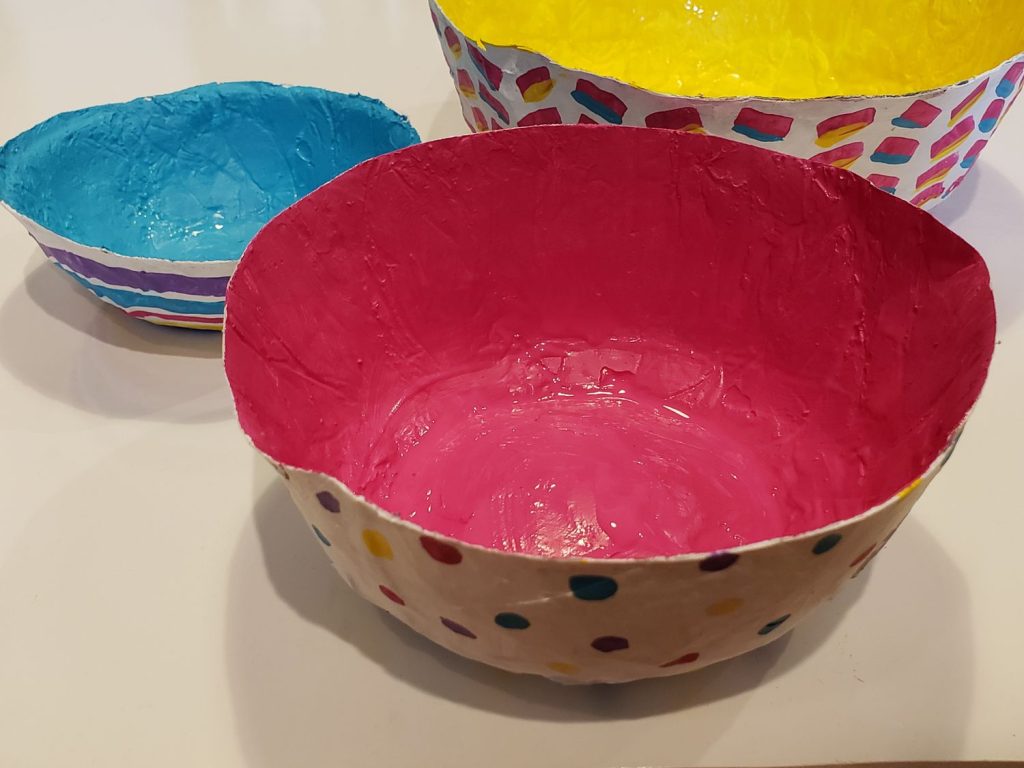
The options are endless when it’s time to decorate your papier-mache nesting bowls, so consider how you’ll use them in your home to draw inspiration. If you plan to keep them in your kitchen as produce holders, go for vibrant, bold colors and designs. Considering adding your bowls to a foyer or side table? Opt for a chic pattern and a pop of metallic to complement your living area.
No matter how you decide to decorate your nesting bowls, acrylic paint and regular paint brushes work perfectly well. To create your own set of these budget-friendly accent bowls, gather your supplies and follow the easy steps below.
What You’ll Need
Equipment / Tools
- Glass nesting bowls
- Mixing bowl
- Wire whisk
- Aluminum foil
- Scissors
- Paint brushes
- Drying racks
Materials
- Flour
- Water
- 1 inch Strips of paper
- Cooking spray
- Acrylic paint (white plus decorative colors)
- Fine grain sandpaper (optional)
- Clear coat finish brush-on or spray
- Non-toxic clear coat finish (optional for food bowls)
Instructions
Mix the Paste
This recipe calls for a non-cooked paste, which can be easier to handle than cooked glue.
- Pour two parts water to one part flour into the mixing bowl and combine well using a wire whisk. The consistency of the mixture should be similar to a pancake batter.
- Whisk until all lumps are gone.
Cover Glass Bowls With Aluminum Foil
To help remove your papier-mache from the bowls easily, cover them first with aluminum foil.
- If you’re looking for a smoother texture in your final product, cover carefully and smooth the foil down with your fingers as much as possible.
- Or, embrace a bit of the natural roughness in papier-mache and don’t worry about the small crinkles.
- For easier papier-mache removal later, hit the foil-covered bowls with a quick coating of cooking spray.
Adhere Newspaper Strips to Bowls With Paste
- Dip one strip of newspaper at a time into the flour mixture.
- Remove the excess glue by sliding the strip of paper between your fingers, then paste it on the foil-covered bowl.
- Criss-cross the strips until most of the bowl is covered.
- Then reinforce the strips by encircling the bowl with horizontal pieces.
- Smooth things over with your fingertips once the entire bowl is covered.
- Repeat these steps for each bowl you are making.
Let Dry Overnight
- Carefully shift the newspaper-covered bowls to wire drying racks.
- Place racks in a cool, out-of-the-way area to set.
- Leave them undisturbed overnight to dry.
Remove Papier-Mache From Foil Bowls and Trim Excess
- Once the papier-mache has dried, carefully remove it from the aluminum foil.
- Trim any excess newspaper from the edges of each bowl with a sharp pair of scissors for a nice, clean edge.
- Decide if you want to finish or change the texture of your bowl (see Tips box).
Prime the Papier-Mache Bowls
- Give each bowl a quick coat of white acrylic paint to ensure your colors really pop later on.
- Let it dry.
- Apply a another coat of paint.
- Allow to dry completely.
Paint and Decorate the Papier-Mache Bowls
- Paint the inside and outside of your bowl.
- Seal everything with brush-on or spray clear coat finish.
Display Your Papier-Mache Nesting Bowls
Find the perfect space in your home for your DIY nesting bowls. They can be practical (think: a place to drop keys or jewelry) or purely decorative, so it’s worth trying a few different spots to see where they work best.
How to Make Papier-Mache Bowls